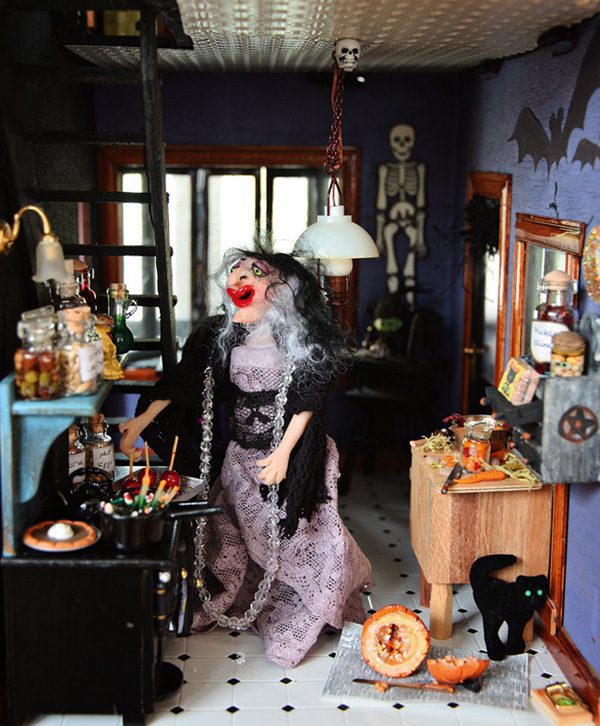
Welcome to DIY Fridays! Today I share with you photos from my haunted DIY Halloween Dollhouse, along with some tips for creating your very own, if you dare! Bwah ha ha ha!…
 I am completely enraptured by Halloween, and for me no other holiday compares. As a young girl I delved into ghost stories and books on makeup and costume how-to’s for Hollywood horror films. Only scary Halloween costumes would do for me — the more fake blood the better:) I had another favorite pastime as well — playing with my Tomy dollhouse, decorating and making things. As an adult I found a way to bring these two loves together in the form of creating a haunted dollhouse! Actually, I have three — one large one fashioned after an old Bayou mansion (as seen in this post), as well as two smaller ones. I do have some tips to share if you are interested in fashioning your own dollhouse, haunted or not:
- Find a dollhouse at a yard sale. I actually purchased this one for $5 at a local tag sale. The house was put together and of sound structure, but unfinished and ready for moi to transform it. I gave it “stucco” siding with joint compound, painted it, attached some creepy Spanish moss with my hot glue gun, made windows from transparencies (some of which I printed ghostly figures on), applied scrapbooking paper “wallpaper,” added dollhouse wood flooring and trim which I cut to size and stained, and wired it with lights.
- Wiring a dollhouse for lights is easier than you may think. Each light comes with a long cord that you plug into a main power strip. You can hide the cord and even paint it if you like, so that it blends in with the decor. I keep the power strip concealed beneath the house. You then plug a lead in wire into the strip, which you attach to a 12V transformer that plugs into the wall. 12V transformers come with varying amounts of watts (mine has 10 watts). A general rule of thumb is that 1 watt will light (1) 60 milliamp lightbulb or (2) 35 milliamp bulbs. Want to see the dollhouse with the lights on? Scroll down darling. Oh, and I am especially in love with the fireplace coals all aflame.
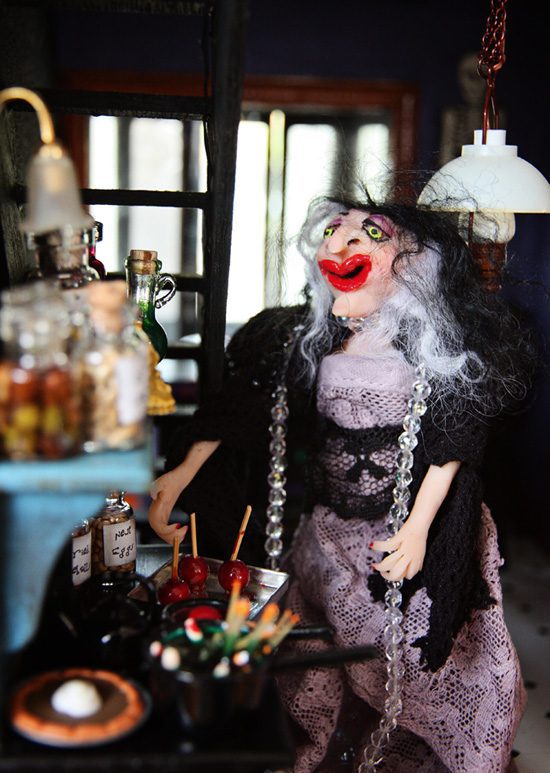
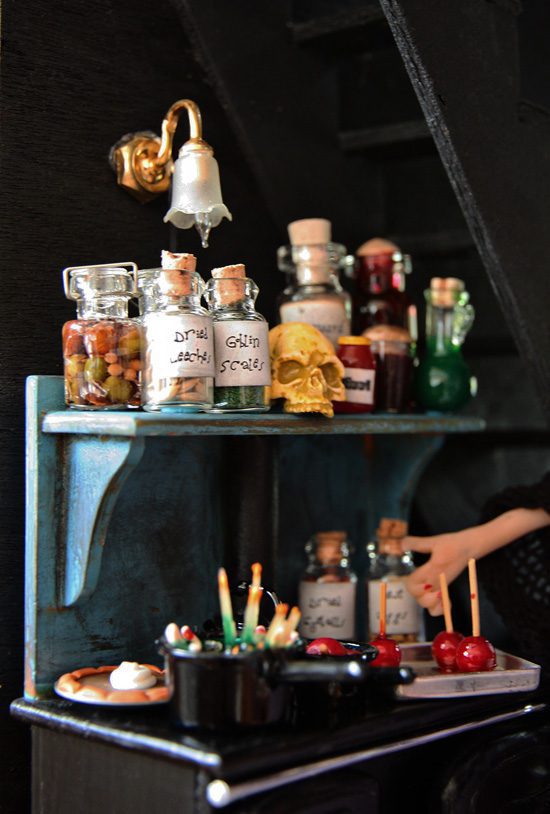
- Making dollhouse food is incredibly fun! I created most of the food in my dollhouse with Fimo (Sculpey also works great). Red glossy glass paint makes great fake blood, spackle works as spreadable icing, and joint compound works for cake decorating (I use my piping set to apply the compound — tip: Don’t use with real food once you have used it for this crafting purpose). I recommend this book to help get you started with miniature food-making.
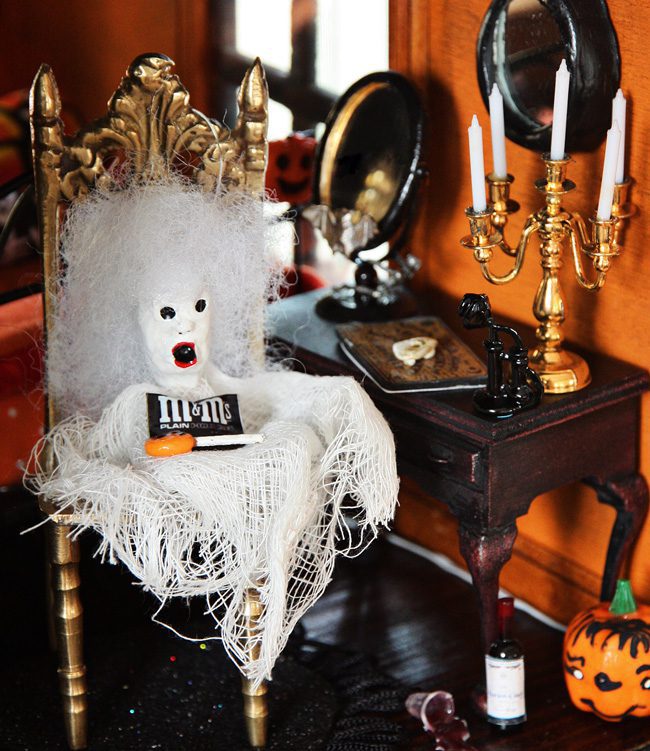
- Want to make a ghost like the ones seen in my photos? — there is a momma and baby ghost hanging on the exterior of the house, and one sitting at the makeup table inside the house. It’s easy! Form a head with a long neck out of Fimo. Poke a hole through the top of the head with a skewer (so you can insert fishing wire for hanging). Craft a face (I used the butt end of a small wooden paint brush for sculpting, or you can use pottery tools). Bake according to package directions. Once cooled you can paint the face, brush on some black pastel chalk, and attach hair with a hot glue gun (I use either mohair doll hair or Poly-Fil). For the dress, use a swatch of white cheesecloth (make a hole in the center of the cloth, slip it over the neck and secure to neck with hot glue). Use fabric stiffener to mold your dress into a shape.
- Where to find furniture and haunted/Halloween-themed decor for your dollhouse? Ebay and Etsy are great venues. I like to distress my dollhouse furniture with fine grit sandpaper. Fake cobwebs add a nice touch too!

Speaking of Halloween DIY projects and crafts, you might be interested in my post 101+ DIY Halloween Crafts, Costumes, Party Ideas, Recipes, + More.
Would you like to see some of the haunted dollhouse pics up close? Click on images to view full size…