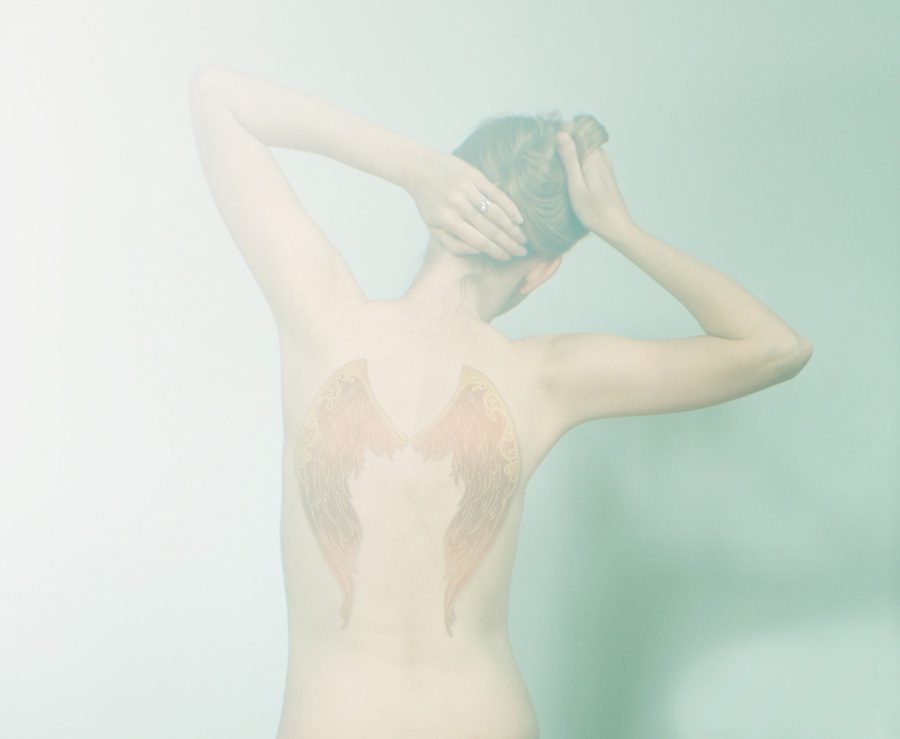
 I am fascinated by the art of tattoo, where often elaborate, symbolic artwork is placed permanently on one’s body. I myself have never taken the plunge and gotten one, but I have developed a passion for creating a variety of digital tattoos in my work. I can be as extravagant and wild as I wish without the commitment.
What You’ll Need for This Tutorial:
Digital Materials:
Subject photo: photo of human figure with exposed skin for tattoo
Additional photo: photo of wing illustration to be used for tattoo
Sources for Project Artwork:
Technical Photoshop Skills:
- Selecting an object with a Lasso Tool (trace around the object to select it — a graphics tablet and pen work better than a mouse for this kind of detailed work). You can also use the Marquee Tool to select an object (this tool makes selections in the shapes of a square, rectangle or ellipse).
- Moving a file into another (use the Move Tool to click and drag one file into another)
- Adjusting the Blending Mode of a layer (Blending Modes are located in a pull-down menu above the Layers Palette)
- Adjusting the Opacity of a layer (the opacity slider is located above the Layers Palette )
- Resizing/Rotating (in Elements: Image> Rotate or Image> Resize, in CS: Image> Image Size or Image> Image Roatation)
- Adding a Solid Color Fill Layer (Layer> New Fill Layer> Solid Color)
- Selecting Colors (choose “paint” from the ‘Set Foreground Color’ box at the bottom of the tools palette)
- Adding a Gradient Fill Layer (Layer> New Fill Layer> Gradient)
Tools:
- Marquee Tool
- Lasso Tool
- Blur Tool
Instructions:
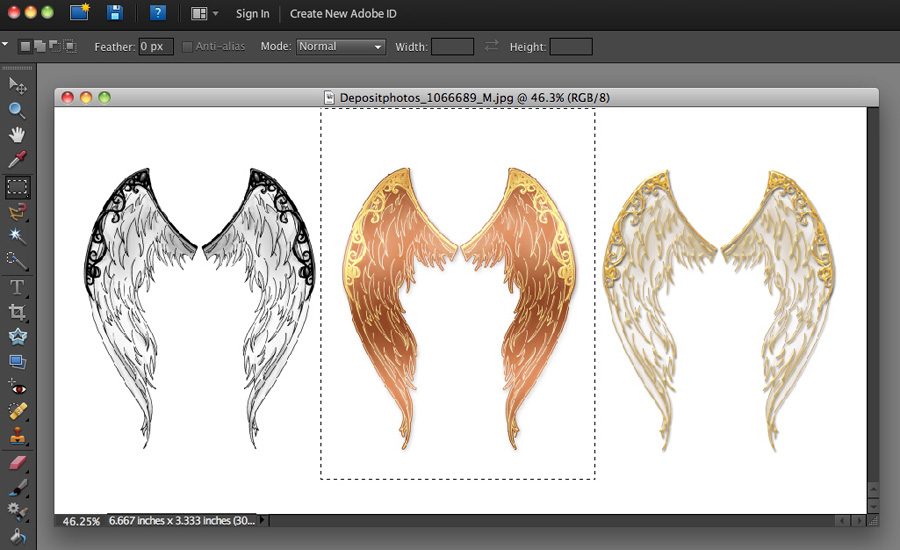
1. Select wings
Open the photo of wings. With either the Marquee Tool (which I used) or the Lasso Tool, select the pair of wings you wish to use for your tattoo.
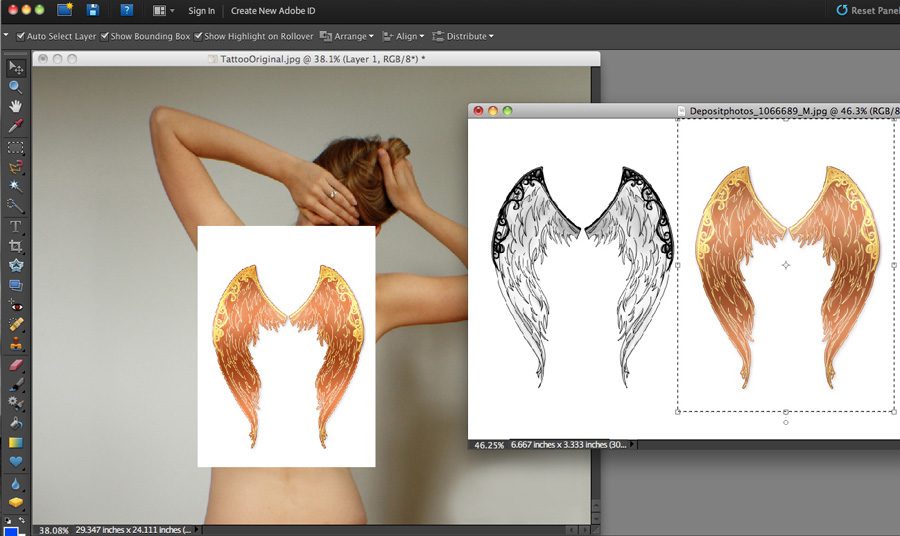
2. Move selection to subject photo of woman
Open your subject photo and duplicate it (don’t use the original photo). This will be your working file. Move the wings into the working file. There is no need to erase the white background on the wing photo, as it will disappear in the next step after we apply a particular Blending Mode.
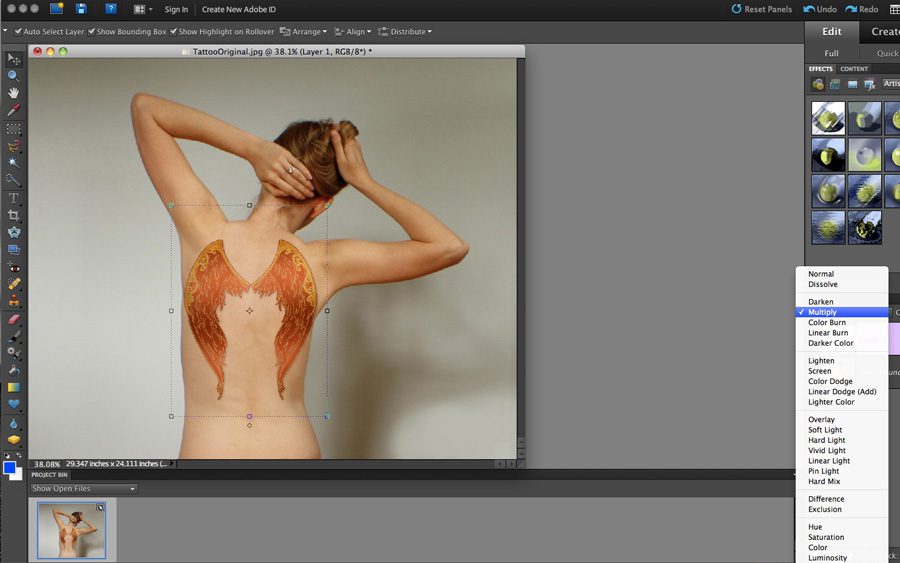
3. Adjust Blending Bode to ‘Multiply’
Set the Blending Mode of the wings layer to Multiply and reduce the Opacity to 65% to soften the tattoo, reveal underlying skin, and make it look more realistic. Place, resize and rotate the wings as needed.
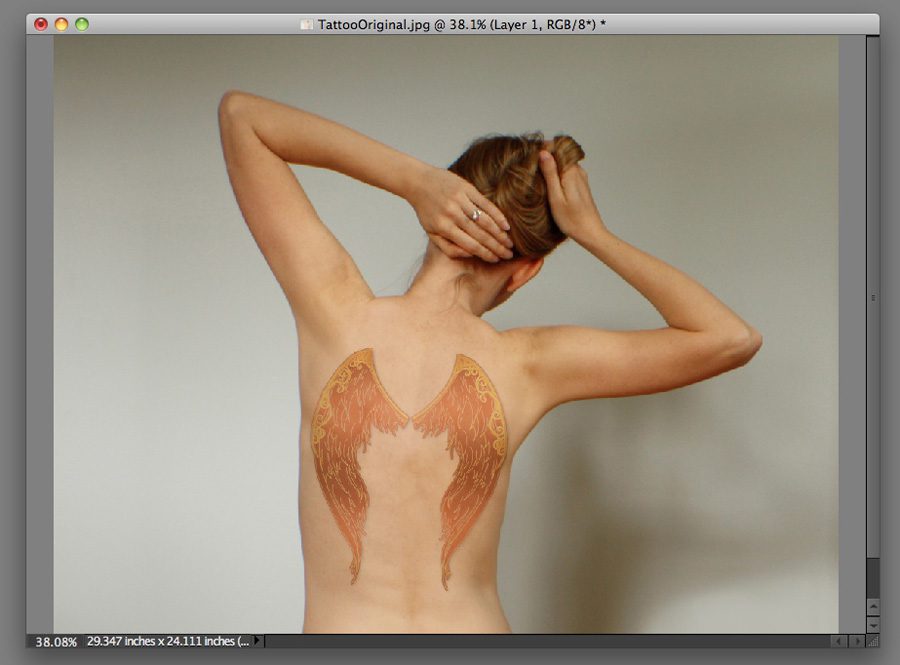
4. Soften edges of tattoo
Use the Blur Tool to soften the edges of the tattoo. I set the strength of the tool to 100% and brushed over the edges as needed.
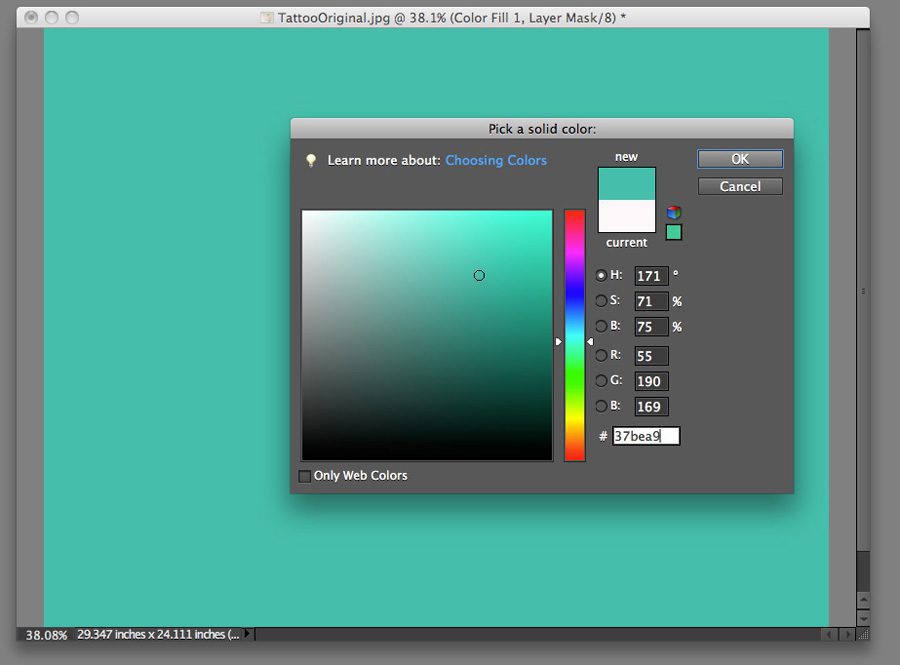
5. Add Solid Color Fill Layer
To add more vibrant color to the piece apply a Solid Color Fill Layer. I used color #37bea9
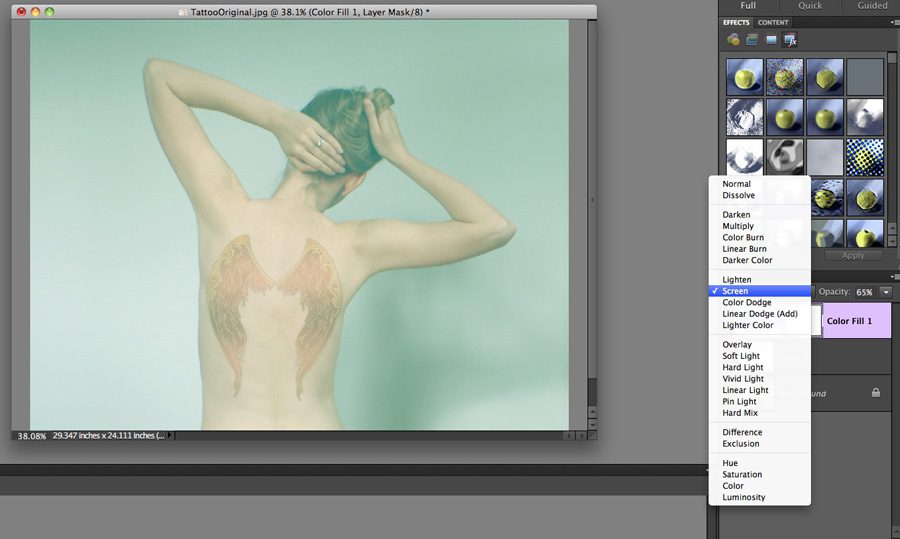
6. Adjust Blending Mode to ‘Screen’
Set the blending mode of the Solid Color Fill Layer to Screen and reduce the Opacity to 65%. This will give the photo a soft, ethereal and atmospheric flavor and help to tie all elements together.
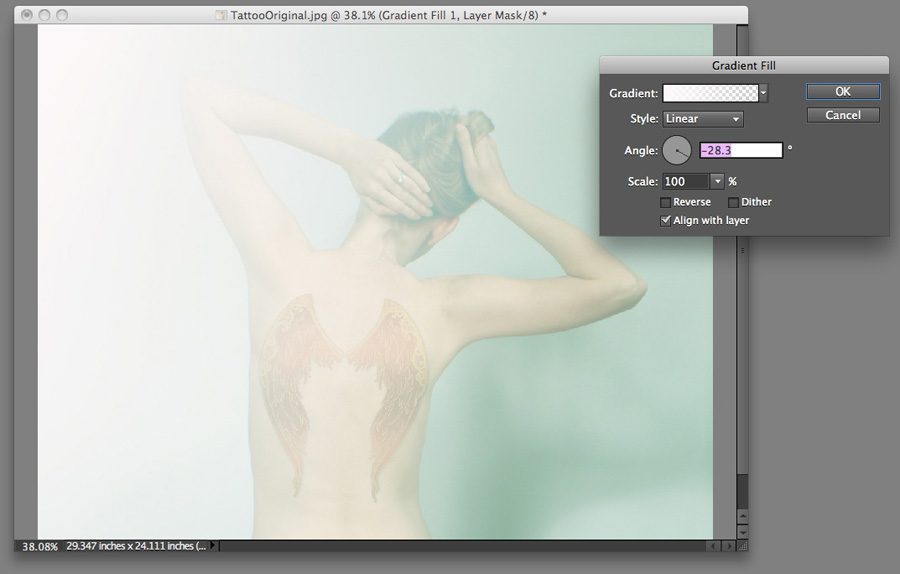
7. Add a Gradient Fill Layer
Adding a Gradient Fill Layer will add interest by creating a dreamy light in your photo. Select white from the Foreground Color Picker and set Style to Linear, Angel to -28.3, Scale to 100%
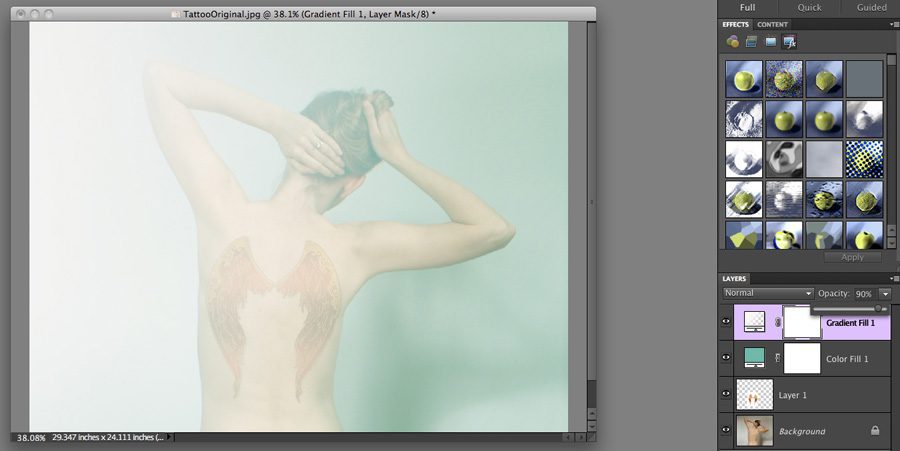
8. Adjust Opacity
Reduce the Opacity of the Gradient Fill Layer to 90% to make the lighting look less harsh. Tip: You can adjust the Opacity of the fill layer in the Layers Palette after you apply the fill, or plug in an Opacity percentage as you are applying the fill (Photoshop will give a prompt for this as you apply the fill). I generally adjust the Opacity after fill application, so I can see what the manipulations look like.
Save file.
Have fun! XO If you want to discover more about altering photos with Photoshop, be sure to check out my latest book, Photo Craft: Creative Mixed Media and Digital Approaches to Transforming Your Photographs, co-authored with Christy Hydeck.
Here are some related posts that might be of interest to you:
